
To set up an ergonomic home office, work through five areas in order: chair, desk, monitor, keyboard and mouse, then comfort accessories. Set your chair so feet rest flat and knees sit near 90 degrees, bring your desk to elbow height, put your monitor’s top edge at eye level 20 to 30 inches away, and add cushions or a footrest only for whatever gap remains.
- Setup order matters. Chair height comes first because it determines the correct desk, monitor, and keyboard height that follow it.
- Cornell’s ergonomics program lists seat height, seat depth, lumbar support, armrest height, recline, and tilt tension as the essential chair adjustments, all free.
- OSHA recommends at least 20 inches of monitor viewing distance, with 20 to 30 inches comfortable for most people and screens.
- A reclined posture of 100 to 130 degrees produces lower lumbar disc pressure than sitting bolt upright at 90 degrees, per Cornell’s research.
In this article:
- The 5 pillars of an ergonomic home office
- 1. Your chair
- 2. Your desk
- 3. Your monitor setup
- 4. Your keyboard and mouse
- 5. Comfort accessories
- Measurements cheat sheet
- The complete setup checklist
- Common home office ergonomic mistakes
- Setting up on a budget
- Frequently asked questions
The 5 Pillars of an Ergonomic Home Office
An ergonomic home office isn’t one purchase, it’s five areas that each depend on the one before it. Get your chair right first, and your desk height follows from it. Get desk height right, and your monitor and keyboard positions follow from that. Skip the order and you end up chasing symptoms with accessories instead of fixing the setup underneath them. The five areas below cover the whole desk, in the order that actually matters.
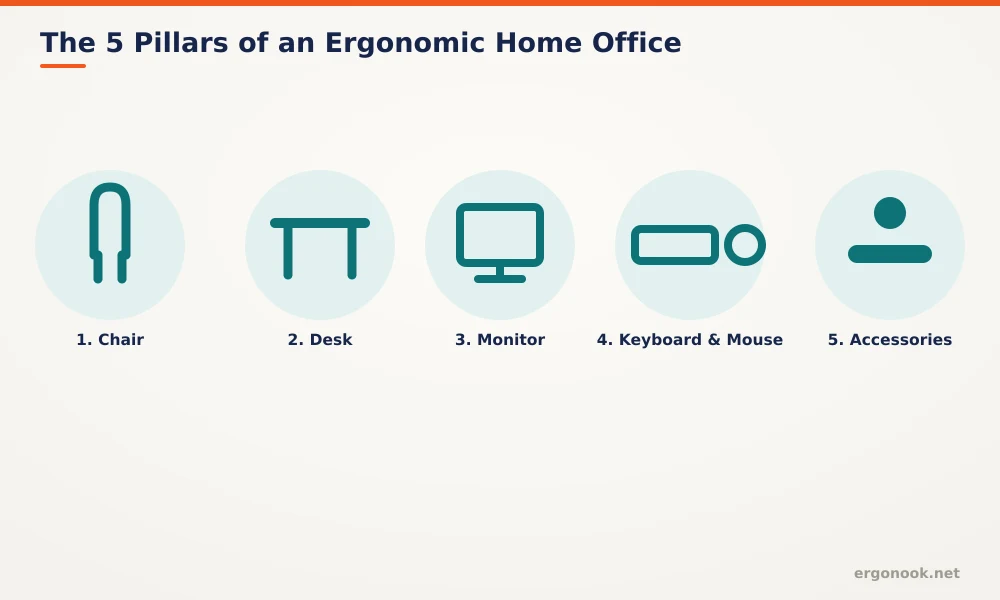
1. Your Chair
Your chair comes first because every other measurement in this guide, desk height, monitor height, keyboard position, is set relative to where you’re sitting. Start with seat height: feet flat on the floor, knees near 90 degrees, the back of your knee slightly higher than the seat edge. From there, work through seat depth (2 to 3 finger-widths behind the knee), lumbar support (positioned at the inward curve just above your belt line, not above or below it), and armrest height (elbows near 90 degrees, shoulders relaxed). Cornell’s ergonomics program lists these, plus recline and tilt tension, as the six essential adjustments on a task chair, and none of them cost anything beyond the few minutes it takes to set them (Cornell CUErgo, Computer Workstation Ergonomics Guidelines).
If your feet don’t reach the floor once seat height is correct, that’s a footrest problem, not a chair problem, covered in the accessories section below. If your chair has no lumbar or depth adjustment at all, a separate cushion can bridge the gap. Our guide to adjusting an ergonomic office chair walks through the full sequence step by step, and our signs your chair is bad for your back covers what to check if adjustments alone aren’t fixing the discomfort. For a chair built with more adjustment range from the start, see our office chairs roundups.
2. Your Desk
Desk height should match your elbow height once your chair is set correctly, not a number based on your total height alone. UCSF’s ergonomics program defines it the same way: hips level with knees, elbows bent near 90 degrees, then measure from the floor to your elbow. As a rough starting point, someone 5’5″ typically lands around 24 to 26.5 inches, someone 6’2″ closer to 27 to 29 inches, seated. A fixed-height desk that doesn’t match your elbow height forces a compromise somewhere else in the chain, usually your wrists or shoulders. A height-adjustable desk removes that compromise entirely and lets you alternate between sitting and standing at the correct height for both.
Our correct desk height guide covers the full measurement process, and how to use a standing desk correctly covers the habits that make a height-adjustable desk actually pay off once you have one. See our standing desks roundups for specific models.
3. Your Monitor Setup
Monitor height and distance both matter, and most desks don’t get either right by accident. Cornell’s ergonomics program recommends your line of sight land 1 to 2 inches below the top of the screen, not centered on the middle, which usually means the top edge sits at or just below eye level. On distance, OSHA recommends at least 20 inches of viewing distance, with 20 to 30 inches comfortable for most screens and most people. Most desks put the monitor too low and too close by default, which is why a stand riser or monitor arm is one of the highest-value cheap fixes in this whole guide.
Our correct monitor height guide and best monitor distance from eyes cover both measurements in detail, including what to do with dual monitors or a laptop screen. See our monitor setup roundups for stands and arms.
4. Your Keyboard and Mouse
Keyboard and mouse position is where wrist and forearm strain usually starts. The keyboard should sit at or just below elbow height, with your elbow angle at 90 to 110 degrees and your wrist straight, in line with your forearm. The mouse should sit right next to the keyboard at the same height, not on a separate surface a few inches away, since OSHA notes that gap forces repeated reaching that loads the shoulder over a full workday. If your desk is a fixed height that doesn’t put the keyboard where it needs to be, a height-adjustable, negative-tilt keyboard tray solves that without needing a new desk.
Our keyboard and mouse positioning guide covers the full setup, and how to reduce wrist pain from typing covers what to do if discomfort is already showing up. See our keyboards and mice roundups for ergonomic keyboards, vertical mice, and keyboard trays.
5. Comfort Accessories
Accessories come last on purpose. They fix specific, identifiable gaps that remain after the first four pillars are set correctly, not general discomfort you haven’t diagnosed yet. A footrest closes the gap if your feet don’t reach the floor at the correct seat height. A lumbar cushion helps if your chair’s built-in support doesn’t reach your lower back curve. A seat cushion adds padding to a thin or worn seat pan, or a shaped cutout if pressure concentrates at your tailbone specifically. An anti-fatigue mat helps if you’re standing at your desk for meaningful stretches of the day.
Buying accessories before fixing the first four pillars is the most common way people waste money on comfort. Our footrest benefits guide and how to make an office chair more comfortable cover which accessory fits which gap. See our comfort accessories roundups for specific picks.
Measurements Cheat Sheet
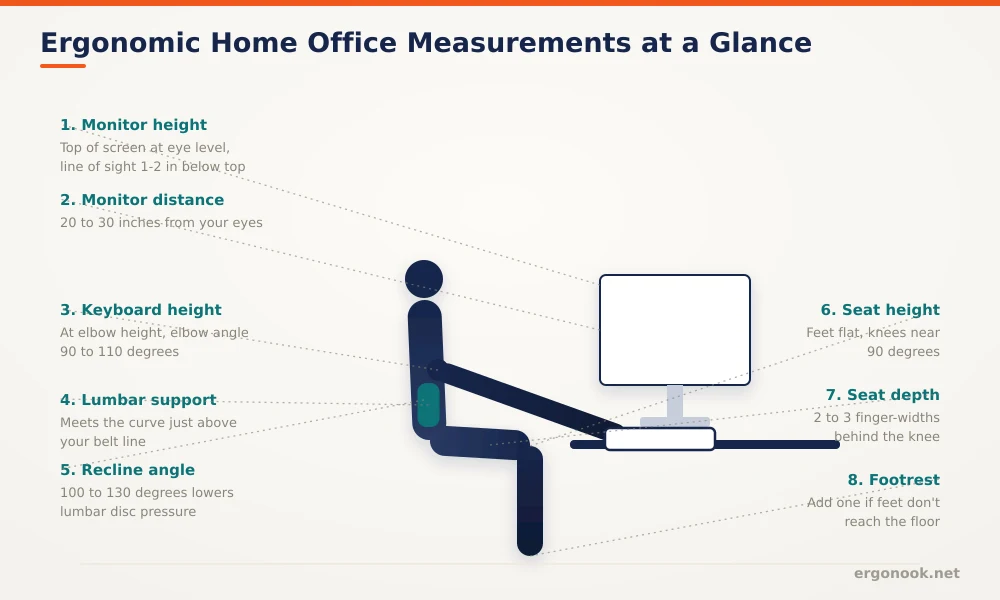
Every number from the five sections above, in one place.
| Area | Target |
|---|---|
| Seat height | Feet flat, knees near 90 degrees |
| Seat depth | 2 to 3 finger-widths behind the knee |
| Lumbar support | Meets the inward curve just above the belt line |
| Recline angle | 100 to 130 degrees, not upright 90 |
| Desk / keyboard height | At elbow height, elbow angle 90 to 110 degrees |
| Monitor height | Top of screen at eye level, line of sight 1-2 in below top |
| Monitor distance | 20 to 30 inches from your eyes |
| Footrest | Add one only if feet don’t reach the floor at correct seat height |
The Complete Setup Checklist
- Set seat height so feet rest flat and knees sit near 90 degrees.
- Set seat depth to leave 2 to 3 finger-widths behind your knee.
- Position lumbar support at the inward curve just above your belt line.
- Set armrests so elbows sit near 90 degrees with shoulders relaxed.
- Loosen recline tension slightly and let yourself lean back a few degrees.
- Bring your desk or keyboard tray to elbow height.
- Check wrist position, straight and in line with your forearm.
- Move your mouse right next to the keyboard, same height.
- Raise your monitor so the top edge sits at eye level.
- Check monitor distance, aiming for 20 to 30 inches.
- Add a footrest only if feet still don’t reach the floor.
- Add lumbar or seat cushions only for gaps that remain after everything above.
Common Home Office Ergonomic Mistakes
The most common mistake is working through this list out of order, buying a cushion or a new chair before checking whether the free adjustments on your current setup were ever actually made. The second is setting everything once and never touching it again. Your setup should change with your chair, your shoes, and even the task you’re doing that day. The third is treating a laptop like a full desktop setup. A laptop’s screen and keyboard are fixed together, which makes it nearly impossible to get both monitor height and keyboard height right at the same time without external hardware. The fourth is ignoring monitor distance entirely while obsessing over height. Both matter, and a monitor set too close undoes the benefit of getting the height right.
Setting Up on a Budget
If you can only do one thing this week, adjust the chair you already have. It costs nothing and fixes more than any single purchase on this list. From there, spend roughly in this order.
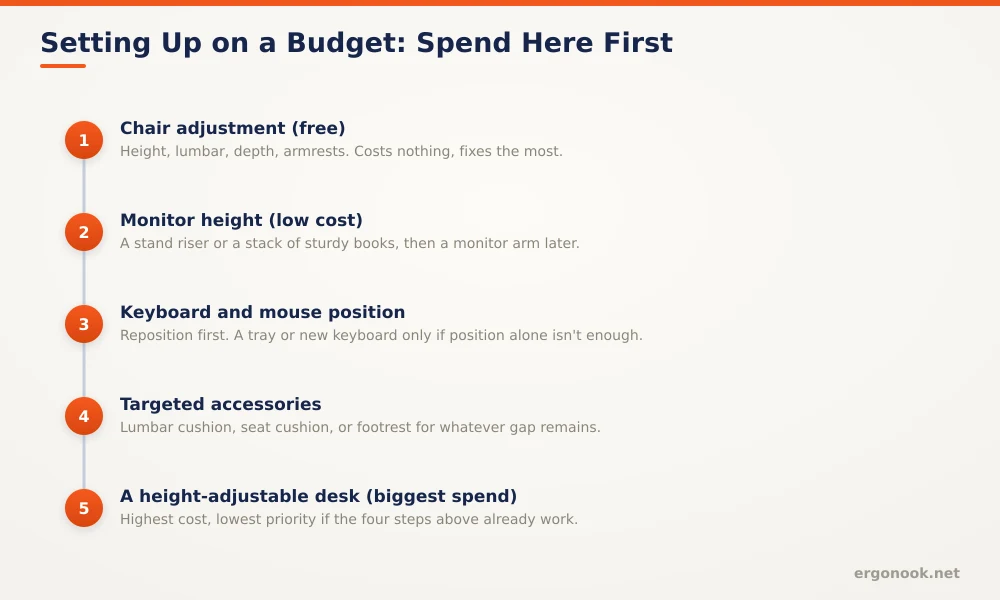
A height-adjustable desk sits last on this list on purpose. It’s the single biggest expense in a home office setup, and for a lot of people, correctly adjusting an existing chair plus a $20 monitor riser closes most of the gap a new desk would otherwise need to fix.
Frequently Asked Questions
How much does a full ergonomic home office setup cost?
Adjusting a chair you already own costs nothing. Adding a monitor riser, footrest, or lumbar cushion typically runs $15 to $50 each. A height-adjustable desk, the biggest single expense, usually starts around $200 to $300 for a basic electric model.
Does the order I set things up in actually matter?
Yes. Chair height determines correct desk height, which determines correct monitor and keyboard height. Setting monitor height before your chair and desk are correct usually means redoing it.
Can I set up an ergonomic home office in a small space?
Yes. The measurements in this guide depend on your body, not your room size. A corner desk, a kitchen table, or a small spare bedroom can all be set up correctly with the same adjustments.
How often should I recheck my setup?
Whenever something changes, a new chair, different shoes, a new desk, or if discomfort starts showing up that wasn’t there before. Otherwise, a quick check every few months catches drift from a chair that’s loosened or a monitor that’s shifted.
An ergonomic home office is five areas set in the right order, not one purchase. Start with your chair, since everything else follows from it, work through desk, monitor, and keyboard height, and add accessories only for whatever specific gap remains once the rest is correct.